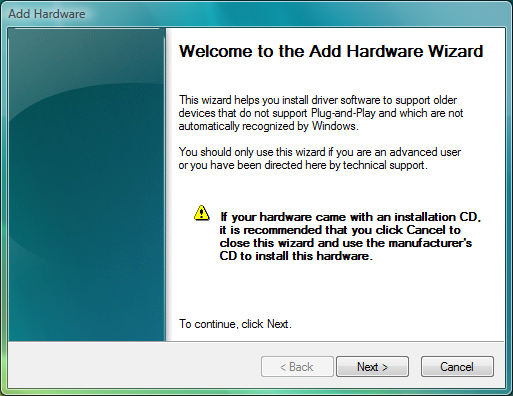
hdwwiz.exeThe Hardware Wizard will come up:
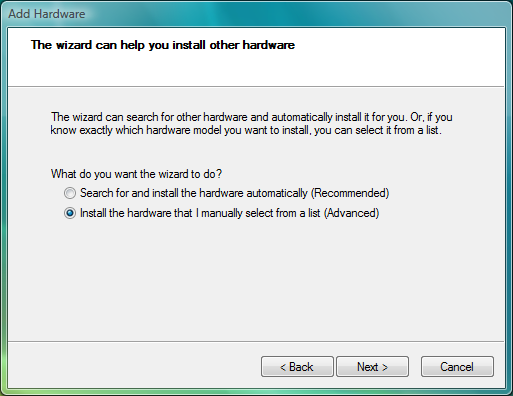
Select Install the hardware that I manually select from a list and click Next.
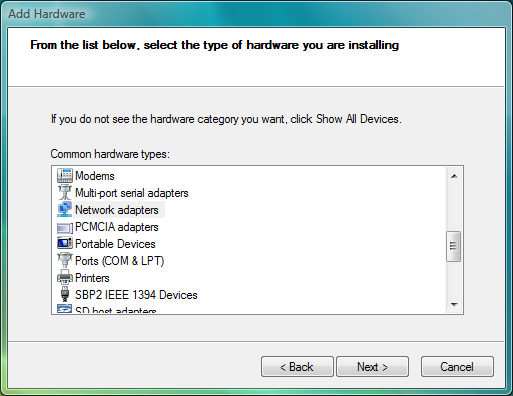
Select the entry Network adapters and click Next.
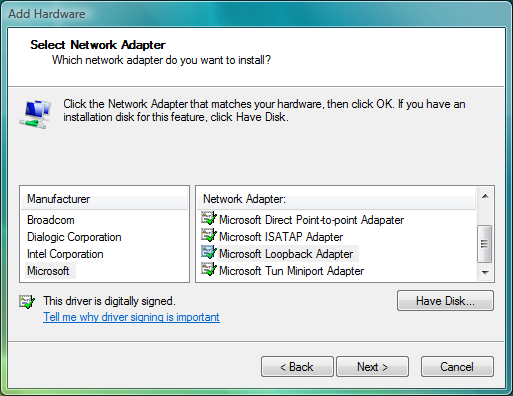
first select Microsoft from the list of Manufacturers and then select Microsoft Loopback Adapter from the list of Network Adapters. Finally, click Next once more.
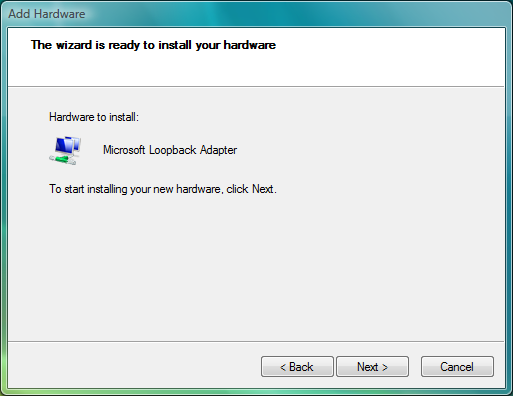
This is your last chance to abort, otherwise, click Next.

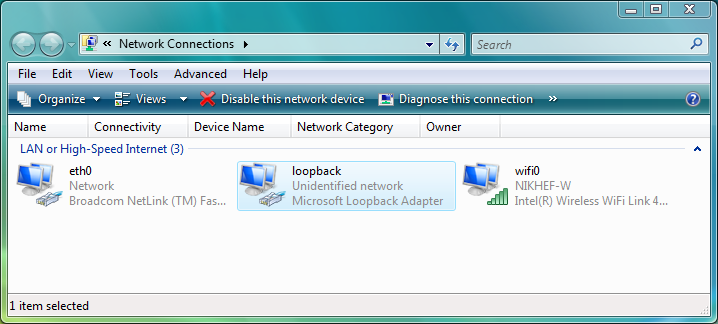
Click Finish to exit the Hardware Wizard.